
BG5475, BG7480, BG7490 US
لمحة سريعة
- Introduction
- IMPORTANT TO KNOW
- General description (Fig. 1)
- Charging
- Using the appliance
- Switching the appliance on and off
- Shaving (heading only)
- Cleaning
- Storage
- Assistance
- Ordering accessories
- Replacement
- Removal of built-in rechargeable battery
- Recycling

Congratulations on your purchase and welcome to Philips.
To fully benefit from the support that Philips offers, register your product at www.philips.com/welcome.
You can find the model number on the back of your product.
The full model number (e.g. BG1234/56) is located on the bottom of the packaging, your receipt or order confirmation.
Charge the appliance fully before you use it for the first time.
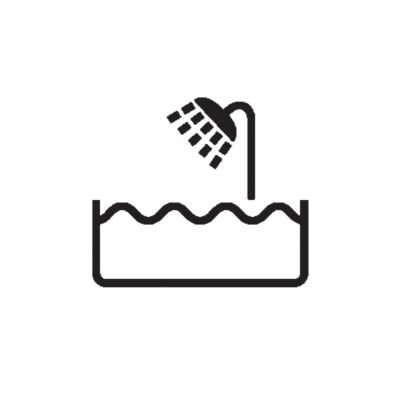
This appliance is waterproof. It is suitable for use in the bath or shower and for cleaning under the tap.
For safety reasons, the appliance can only be used without cord.
You can use the appliance wet or dry to shave or trim hair on all parts of the body below the neckline.The appliance is not intended for shaving or trimming your face or head.
While the appliance can be used both wet and dry, we recommend using it on clean, dry hair, as wet hair tends to stick to the body.
Always check the shaving head, the trimming head and the cutting units before use to make sure they are clean, in good condition and not damaged or worn. A damaged part can cause skin irritation and reduced product performance.
Whenever possible, stretch the skin with your free hand for easier shaving or trimming.
Clean the appliance after each use.
Cutting unit of shaving head
Shaving head
Release button
On/off button
Battery status indicator
Socket for small plug
Small plug of USB cable
USB cable
Note: The USB power source is not included. A suitable USB power source (e.g. Philips HQ87) is available via www.philips.com/support.
Shaving comb 2 mm
Shaving comb 3 mm (only with models BG3480, BG3485, BG5470, BG5475, BG5480)
Shaving comb 5 mm (only with models BG3485, BG5470, BG5475, BG5480)
Cleaning brush
Caution
Charging or using the appliance at temperatures below 10 °C or higher than 35 °C adversely affects the lifespan of the battery.
If the appliance is subjected to a major change in temperature, pressure or humidity, let the appliance acclimatize for 30 minutes before use.
The USB power source is not included. To safely charge your product, only use a certified IPX4 power source with output rating 5 V, ≥ 1.
Battery status indicator
Battery status | Indicator mode |
|---|---|
Almost empty | Flashing orange light |
Charging | Flashing white light |
Fully charged | Solid white light |
Note: Approx. 60 seconds after the battery is fully charged, the battery status indicator switches off automatically.
Charge the appliance before first use and when the battery status indicator shows that the battery is almost empty.
Model number | Time to full charge | Run time |
|---|---|---|
BG3470 | 8 hrs | 60 min |
BG3475, BG3480, BG3485 | 8 hrs | 80 min |
BG5470, BG5475, BG5480 | 1 hr | 120 min |
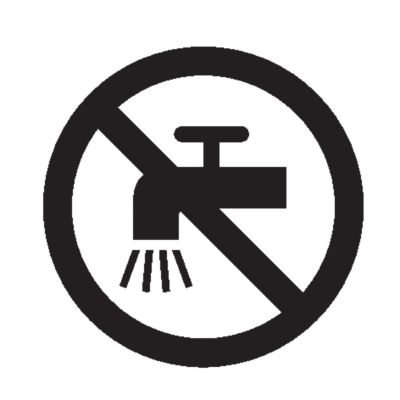
Warning: Keep the USB cable and the USB power source dry.
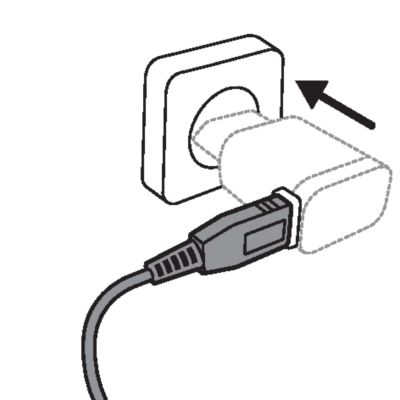
Make sure the appliance is switched off.
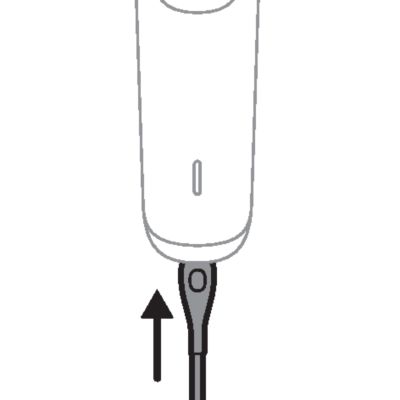
Insert the small plug of the USB cable into the socket in the bottom of the appliance.
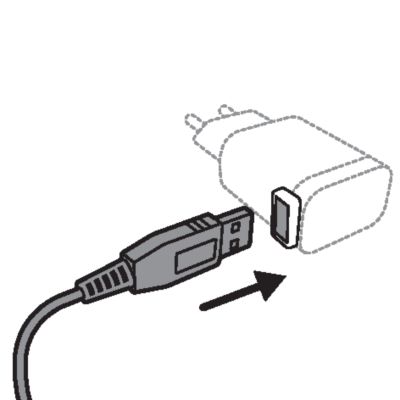
Insert the USB plug into the USB power source (not included).
Insert the USB power source into the power outlet.
After charging, remove the USB power source from the power outlet and pull the small plug out of the appliance.
Always check the appliance and all accessories before use. Do not use the appliance or any accessory if it is damaged, as this may cause injury. Always replace a damaged part with one of the original type.
Because of hygiene, only one person should use the appliance.
Detaching and attaching trimming units
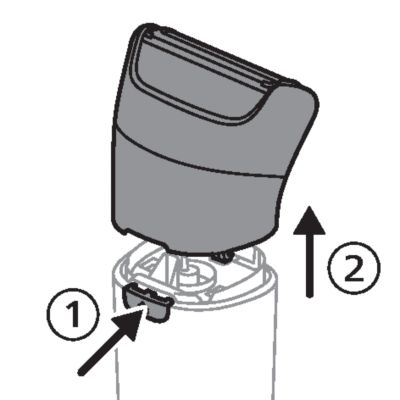
To detach the shaving head from the appliance, press the release button at the back of the handle and gently lift the head off the handle.
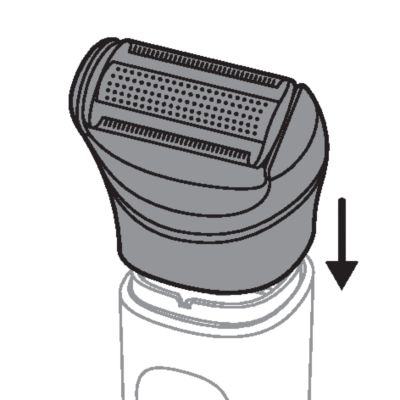
To attach the shaving head onto the appliance, align the head with the top of the handle and gently press it down until it clicks into place.
To switch the appliance on or off, press the on/off button once.
When shaving sensitive areas for the first time, you may experience some discomfort, irritation or reddening of the skin. This is normal as your skin needs time to adjust to shaving.
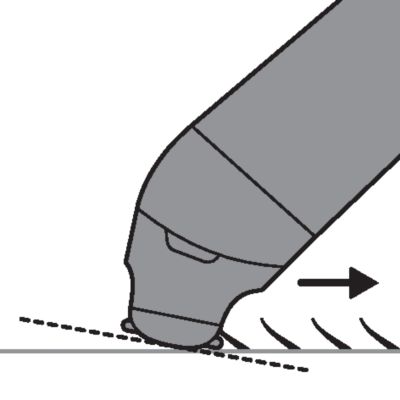
For fast shaving, hold the appliance in such a way that both the front teeth and the cutting unit of shaving head touch the skin. This allows you to catch both short and long hairs in each stroke.
If your hair is longer than 10 mm, pre-trim your hair to a shorter length first for optimum shaving results.
Use the shaving head to shave body hair below the neckline.
Attach the shaving head onto the appliance.
Switch on the appliance.
Stretch your skin with your free hand. Place the shaving head in such a way so that both the front teeth and the cutting unit of shaving head touch the skin. Gently press the shaving head onto the skin and move it slowly and smoothly against the direction of hair growth.
Do not press too hard. Too much pressure can distort the cutting unit of shaving head and cause skin irritation.
The shaving head is bi-directional, which means that you can shave by moving the appliance up and down. Shave against the direction of hair growth for optimal performance.
Switch off and clean the appliance after each use.

Trimming comb of shaving head
You can attach a shaving comb onto the shaving head to trim hairs to an even length. The numbers on the combs correspond to the remaining hair length in millimeters.
To attach a shaving comb onto the shaving head, align the indent in the comb with the notch on the back of the shaving head. Then simply snap the comb onto the shaving head ('click').
To detach the shaving comb from the shaving head, place a fingernail between the comb and the shaving head to the left or right of the notch on the back. Then pull the back of the comb upwards.
Do not pull at the sides or teeth of the shaving comb to remove it.


Attach the shaving comb onto the shaving head.
Switch on the appliance.
Move the appliance slowly and with light pressure against the direction of hair growth.
Switch off and clean the appliance after each use.
The comb is bi-directional, which means that you can move the appliance up and down while shaving. Shave against the direction of hair growth for optimal performance.

Attaching and detaching the cutting unit of shaving head
Detach the cutting unit of shaving head for thorough cleaning or to replace a worn cutting unit.
The cutting unit of shaving head is a precision part. Handle it with care.

Hold the cutting unit of shaving head by its plastic housing only.
To detach the cutting unit from the shaving head, hold the plastic housing of the cutting unit on both sides and gently pull it out of the shaving head.
To attach the cutting unit onto the shaving head, align the cutting unit with the shaving head and snap it into place.

Switch off the appliance before removing or attaching attachments.
Only use cold or lukewarm water to clean the appliance.
Never use scouring pads, abrasive cleaning agents or aggressive liquids such as petrol or acetone to clean the appliance.
Never dry the cutting units with a towel or tissue, as they may get caught in the teeth and cause damage.
Cleaning the shaver
Do not clean the cutting unit of shaving head with the brush. The brush can be used for all other parts and attachments.

Note: Do not place or store the appliance where it can fall or be pulled into a tub or sink, water or other liquid while plugged in.
Make sure that the appliance is switched off and that the USB supply unit has been removed from the wall socket and from the appliance.
Do not wrap the USB cable around the appliance when storing.
Attach a shaving comb onto the shaving head to protect the cutting unit during storage.
For all product support, power consumption details and the EU Declaration of Conformity, please visit www.philips.com/support.
To buy accessories or spare parts, visit www.philips.com/parts-and-accessories or go to your Philips dealer. You can also contact the Philips Consumer Care Center in your country (see the international warranty leaflet for contact details).
The following accessories are available:
Cutting unit of shaving head: model BG2010/43.
For maximum shaving performance, we advise you to replace the cutting unit of shaving head every year (model BG2010/43).
If the cutting unit is worn or damaged, do not use the appliance and replace it immediately. Always replace the cutting unit of shaving head with the original Philips accessory.
Switch off the appliance and disconnect it from the power outlet.
Remove the cutting unit from the shaving head by pulling it off the appliance.
Place the new cutting unit onto the shaving head by snapping it into place. You will hear a click.
After replacing the cutting unit, make sure that the shaving head is firmly attached before using the appliance.
The built-in rechargeable battery must only be removed by a qualified professional when the appliance is discarded. Before removing the battery, make sure that the appliance is disconnected from the wall socket and that the battery is completely empty.
Take any necessary safety precautions when you handle tools to open the appliance and when you dispose of the rechargeable battery.
When you handle batteries, make sure that your hands, the product and the batteries are dry.
To avoid accidental short-circuiting of batteries after removal, do not let battery terminals come into contact with metal objects (e.g. coins, hairpins, rings). Do not wrap batteries in aluminum foil. Tape battery terminals or put batteries in a plastic bag before you discard them.
Check if there are screws in the housing of the appliance. If so, remove them.
Remove any additional screws, panels or parts of the appliance until you see the printed circuit board with the rechargeable battery.
Remove the rechargeable battery.
This symbol means that electrical products and batteries shall not be disposed of with normal household waste.
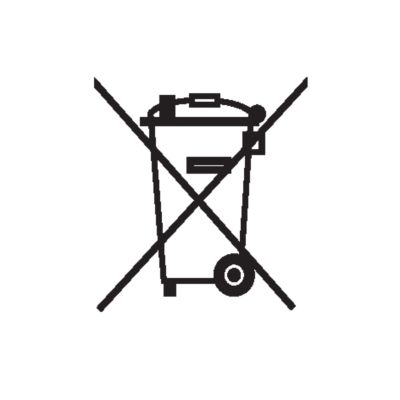
Follow your country’s rules for the separate collection of electrical products and batteries.
الدعم من Philips
هل منتجك لا يعمل كما ينبغي؟
الدعم من Philips
هل تريد معرفة المزيد عن منتجك؟