
User manual: Philips OneBlade

لمحة سريعة
- Product overview
- Warning
- Introduction
- General description (Product overview)
- Getting started
- Using OneBlade
- Maintenance
- Ordering accessories
- Recycling
- Warranty and support
To charge the product, only use a certified safety extra low voltage (SELV) supply unit with output rating 5 V, ≥ 1 A. For safe charging in a moist environment (e.g. in a bathroom), only use an IPX4 (splash-proof) supply unit. A suitable supply unit (e.g. Philips HQ87) is available via www.philips.com/support. If you need support finding the correct USB supply unit, contact the Consumer Care Center in your country (see the international warranty leaflet for contact details). Using a non-certified supply unit may cause hazards or serious injuries.
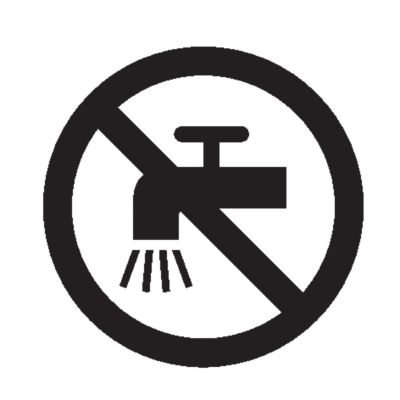
Keep the USB cable and the USB supply unit dry.
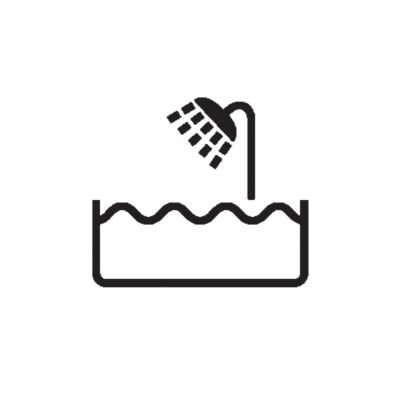
This appliance is waterproof. It is suitable for use in the bath or shower and for cleaning under the tap. For safety reasons, the appliance can therefore only be used without cord.
This appliance can be used by children aged from 8 years and above and persons with reduced physical, sensory or mental capabilities or lack of experience and knowledge if they have been given supervision or instruction concerning use of the appliance in a safe way and understand the hazards involved. Children shall not play with the appliance. Cleaning and user maintenance shall not be made by children without supervision.
Do not modify the supply unit.
Do not use the supply unit in or near wall sockets that contain an electric air freshener to prevent irreparable damage to the supply unit.
Do not use a damaged appliance. Replace damaged parts with new Philips parts.
Because of hygiene, only one person should use the appliance.
Unplug the appliance before cleaning it with water.
Only use cold or lukewarm water to clean the appliance.
Never use compressed air, scouring pads, abrasive cleaning agents or aggressive liquids to clean the appliance.
Only use original Philips accessories or consumables.
Charge, use and store the product at a temperature between 5 °C and 35 °C.
Keep product and batteries away from fire and do not expose them to direct sunlight or high temperatures.
If the product becomes abnormally hot or smelly, changes color or if charging takes longer than usual, stop using and charging the product and contact Philips.
Do not place products and their batteries in microwave ovens or on induction cookers.
Do not open, modify, pierce, damage or dismantle the product or battery to prevent batteries from heating up or releasing toxic or hazardous substances. Do not short-circuit, overcharge or reverse charge batteries.
If batteries are damaged or leaking, avoid contact with the skin or eyes. If this occurs, immediately rinse well with water and seek medical care.
Electromagnetic fields (EMF)
This Philips appliance complies with all applicable standards and regulations regarding exposure to electromagnetic fields.
Congratulations on your purchase and welcome to Philips! To fully benefit from the support that Philips offers, register your product at www.philips.com/welcome.
Note: Accessories may vary depending on the model purchased. Please refer to the product packaging to find out which accessories are included with your product.
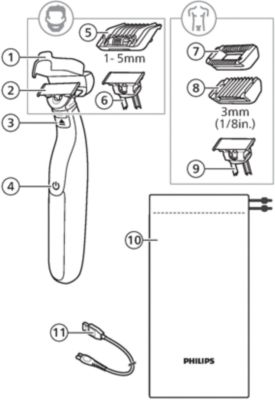
Protection cap
360 blade for face
Blade release switch
On/off button
5-in-1 comb
Original blade for face
Skin guard
Body comb
Original blade for body
Pouch
USB cable
Note: A suitable power source (e.g. Philips HQ87) is available via www.philips.com/support.
Charging
When the battery is low, the motor will run more slowly. To charge the battery:
Warning: Keep the USB cable and the USB power source dry.
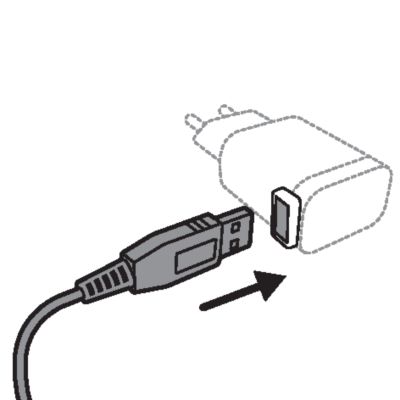
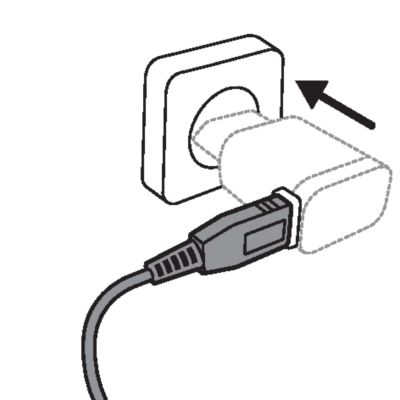
Insert the small plug of the USB cable into the socket in the bottom of the product.
Insert the USB plug into the USB power source (not included).
Insert the USB power source into the power outlet. The charging indicator will remain illuminated when the product is connected to the power outlet.
Unplug the adapter from the power source, then remove the USB cable from the handle.
Note: for safety reasons, the product can only be used when the USB cable is not attached.
The charging and usage times for your OneBlade depends on the model you own. The table low provides an indication of the most common charging and usage times for OneBlade. Refer to the printed user manual provided with your product to find out which timings apply to your model.
Charging time | Usage time |
8 hours | 45 minutes |
4 hours | 60 minutes |
Turning OneBlade on and off
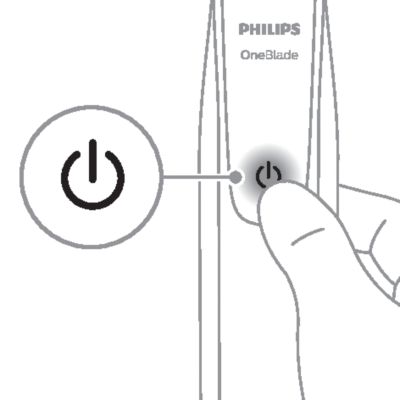
To turn your OneBlade on or off, simply press the power button once.
Tip: If the OneBlade will not turn on, check that the battery is fully charged and remove the charging cable from the handle before pressing the power button.
Choosing the correct blade
Depending on the model purchased, your OneBlade pack includes either one or two different types of blade.
The 360 blade (recognizable by its U-shaped construction) is designed to closely follow the contours of your face. This type of blade is labeled as number 2 in the product overview illustration.
The Original blade is the perfect all-rounder for day-to-day shaving and grooming on both your face and body. This type of blade is labeled as numbers 6 (for face) and 9 (for body) in the product overview illustration.
For hygiene reasons, it is recommended to use different blades for your face and body.
If your model includes a 360 blade, it is recommended to use that blade type for your face.
Note: all OneBlade models are compatible with both types of blade, and both can be ordered as replacement parts.
Facial Hair
Shaving and edging
To shave with OneBlade, remove any combs. Your OneBlade is waterproof, so you can shave in the shower or with foam or gel.
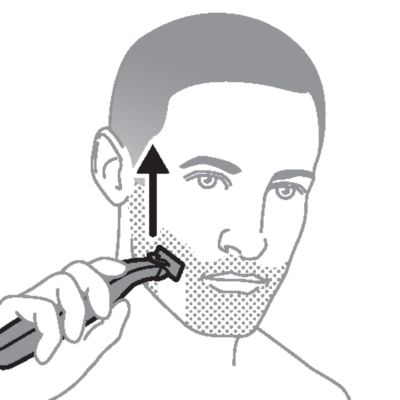
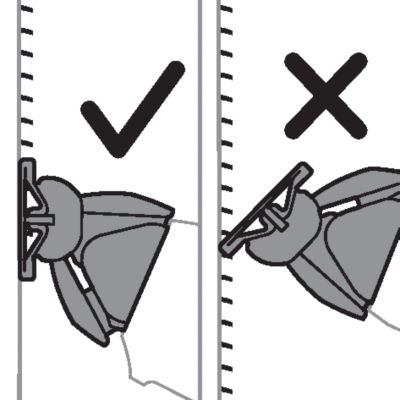
To shave, make long, slow and steady strokes, applying gentle pressure with the blade flat against your skin. Move the blade back and forth to make use of both sides of the blade.
To edge or contour your beard, mustache or sideburns, hold the blade perpendicular to your skin.
For best results, clean your OneBlade after each use.
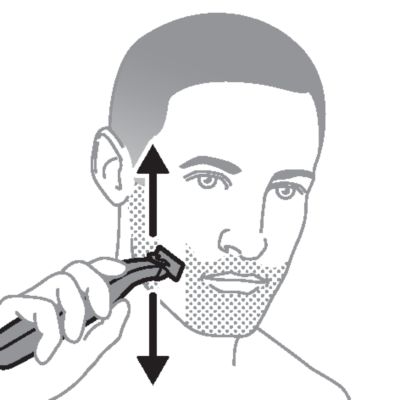
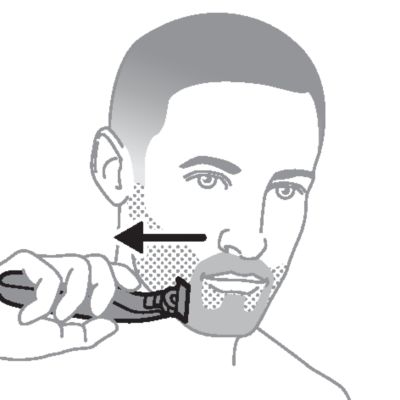
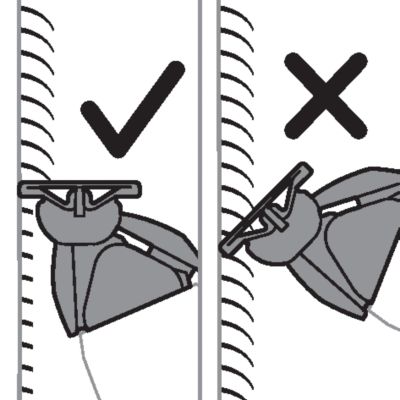
Trimming
To trim the length of your facial hair, use the 5-in-1 comb. The numbers on the comb relate to the hair length remaining after trimming (in millimeters).
Tip: if you are unsure which length you prefer, start with the longest setting and reduce the length further if necessary.
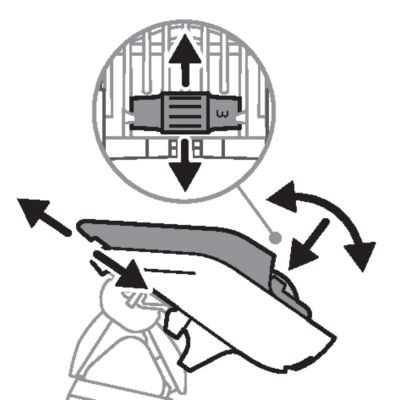
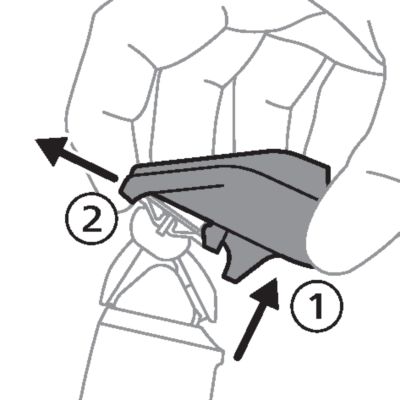
Hook the back of the comb under the bottom of the blade, then gently press on the front of the comb until it clicks into place.
Note: if you experience difficulties attaching the comb, ensure that the two small hooks on the bottom (on the side closest to the teeth) are properly aligned on the upper edge of the blade.
Press down on the length dial on the comb using your thumb, and roll it until your preferred length is selected.
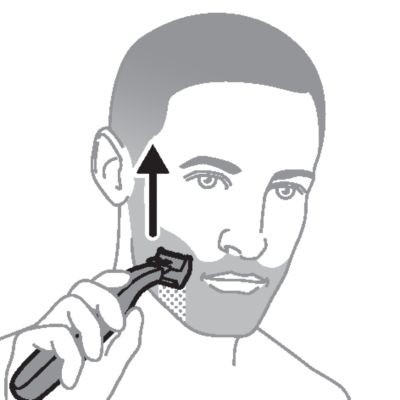
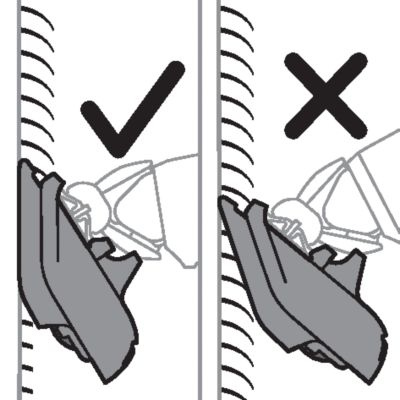
Trim against the direction of hair growth, with the teeth of the comb flat against your skin
To detach the comb, hold the handle firmly and gently lift the comb off the blade. For best results, clean your OneBlade after each use.
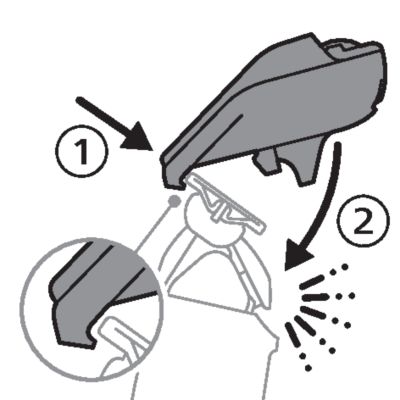
Body Hair
Shaving body hair
Use your OneBlade with the body blade attached to shave hair anywhere below the neck.
Areas including your chest, stomach and legs can be shaved using the bare blade, in the same way as shaving your face.
Note: to minimize the risk of cuts always use the SkinGuard when trimming sensitive areas. This includes when shaving your armpits or groin (including scrotum).
If you are using the SkinGuard, place it onto the blade and gently press until it clicks into place.
Switch on your OneBlade, and place the blade flat against your skin.
Make long, steady strokes, exerting gentle pressure and allowing the blade to glide across the surface of your skin.
Tip: on certain areas, using the fingers of your free hand to spread the skin and hold it taut will provide better results.
The blade and SkinGuard are double sided. Move the blade back and forth to catch hairs growing in different directions.
Clean your OneBlade after each use. If you used the skin guard, press your thumb onto the exposed flat surface of the blade, and use your fingers to gently pull off the skin guard before cleaning.
Trimming body hair
Note: the accessories mentioned in this section are only provided with Philips Norelco Face + Body models. These accessories are also available to purchase separately.
The 3mm (1/8 inch) body comb allows you to trim hair on your body below the neckline (for example chest, armpits and groin)
For delicate areas such as the groin, only trim when the body comb or skin guard is attached.
Place the the comb onto the blade and gently press until it clicks into place.
Switch on your OneBlade.
Trim against the direction of hair growth, with the teeth of the comb flat against your skin. The comb is double sided, so you can move your OneBlade back and forth to cut hairs growing in different directions.
To detach the comb, hold the handle firmly and gently lift the comb off the blade. For best results, clean your OneBlade after each use.
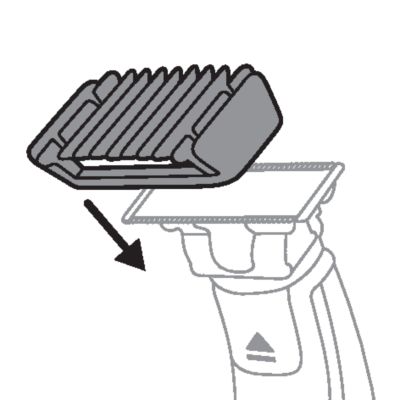
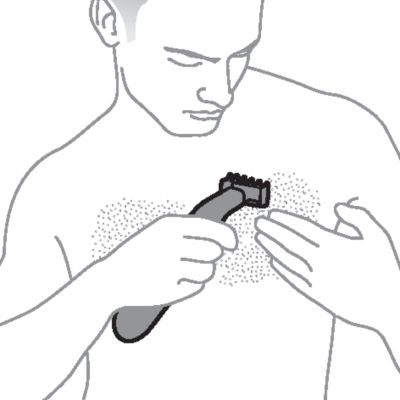
Cleaning OneBlade
Clean after each use
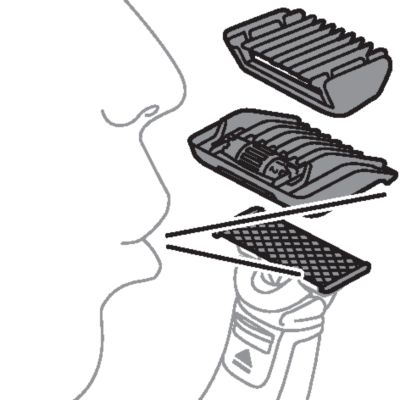
For a quick clean, simply blow on the blade and any accessories to remove hairs and dirt.
Thorough cleaning
Turn on your OneBlade and rinse it under the tap with cold or lukewarm water. If you shave with foam or gel, be sure to remove all residue after each shave.
Combs can also be cleaned under the tap using warm water.
Allow your OneBlade and accessories to air dry completely before storage.
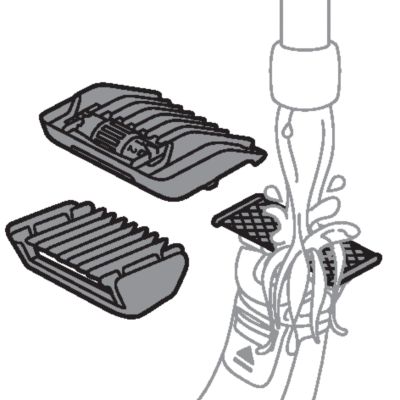
Note: Do not bang the handle on the sink or any hard surface, a this may damage your OneBlade. Do not use a towel or cloth to dry the blade.
Storage
Store your OneBlade in a safe, dry location where it will not be crushed, banged, or subject to damage. To protect the blade, store the product with the protection cap attached. Do not wrap the cable around the product when storing, and do not place or store the product where it can fall or be pulled into a tub or sink, water or other liquid while plugged in.
Blade Replacement
When to replace the blade
We recommend replacing the blade of your OneBlade at least once every four months, or whenever the blade shows signs of wear.
Wear indicator
A replacement symbol will gradually appear on the blade as you use it. When the replacement symbol is fully visible, it's time to replace your blade.
Note that accessories such as combs can prevent the replacement symbol from becoming visible.
Tip: the replacement symbol resembles the arrow icon on the handle of your OneBlade. For older blades, a green rectangle may appear in place of the replacement symbol.
If blade is damaged
If you notice any damage on your blade, please replace it immediately.
How to replace the blade
Before you begin, make sure your OneBlade is switched off and any combs are removed.
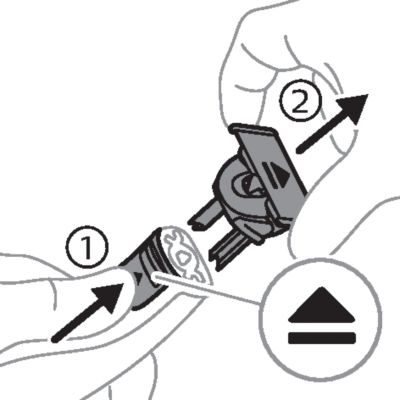
Gently pull off the old blade, holding it by both short sides.
The old blade can be discarded with your normal household waste.
Remove your replacement blade from the packaging. To avoid damaging the blade, don't use sharp objects or crush the packaging.
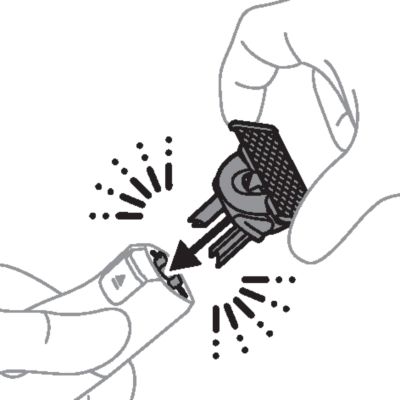
Hold the new blade by both short sides and insert the protrusions on the bottom of the blade into the slots on the OneBlade handle.
Gently press the blade downwards onto the handle until it clicks into place.
Your OneBlade is now ready to use.
To buy accessories or spare parts, visit www.philips.com/parts-and-accessories or visit a Philips dealer. You can also contact Philips Consumer Care at https://www.philips.com/contact for support.
This symbol means that this product shall not be disposed of with normal household waste (2012/19/EU).
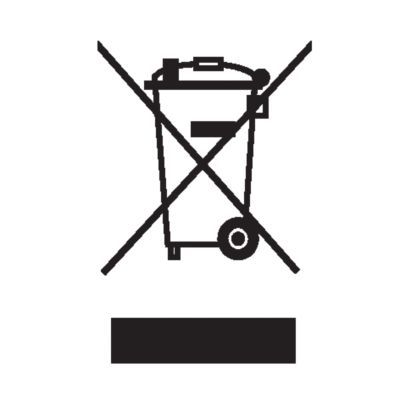
This symbol means that this product contains a built-in rechargeable battery which shall not be disposed of with normal household waste (2006/66/EC). Please take your product to an official collection point or a Philips service center to have a professional remove the rechargeable battery.
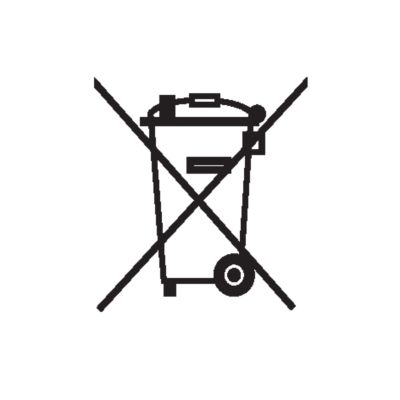
Follow your country’s rules for the separate collection of electrical and electronic products and rechargeable batteries. Correct disposal helps prevent negative consequences for the environment and human health.
If you need information or support, please visit www.philips.com/support or read the international warranty leaflet.
Warranty restrictions
Cutting units are not covered by the terms of the international warranty because they are subject to wear.
الدعم من Philips
هل منتجك لا يعمل كما ينبغي؟
الدعم من Philips
هل تريد معرفة المزيد عن منتجك؟